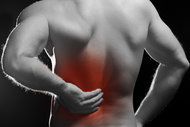
The lower back is a generator for a number of types of pain. As you know, it involves several different articulations: the lumbar spine with vertebral bodies, discs and facets; the sacroiliac joints; and the lumbosacral junction. More often than not, patients automatically assume their back pain is due to a disc herniation and sciatica. While screening for a disc is important and reasonable, don't forget to evaluate the pelvic ring as a source of mechanical lower back pain.
1. Goldthwait's Sign
Probably the most common low back test is the straight leg raise,2 and this test can be amended to specifically test for the SI. Goldthwait's sign is an easy extension of the prone SLR. If pain is produced in the lower back complex with the SLR, slide your hand under the back and palpate the lumbosacral level. If, when performing the SLR, pain is produced before the L/S articulation separates, it is reasonable to suspect an SI lesion. If the pain is produced after the L/S spinous processes separate, then it is more likely a lumbar or lumbosacral issue.
2. Knee-to-Shoulder Test
Continuing this motion is the knee-to-shoulder test: flexing both the hip and the knee of the affected side to 90 degrees, and pushing the knee up to the abdomen and then across to the opposite side. If this again produces pain in the pelvis, you can suspect mechanical irritation of the SI on that side.
3. Leguerre's Test
Taking that same bent leg and pulling it away from the body while stabilizing the opposite ASIS can also stress the SI joint – this is documented as Leguerre's test.
4. The Gapping Test
If you have decided the pain is coming from the SI, further testing is reasonable. It is not good to only have one test or screening maneuver to determine a specific diagnosis – more supporting findings always helps to validate your diagnoses and care. While the patient is still prone for exam, you can now perform the Gapping test – leaning over the patient and pushing with crossed palms to separate the ASIS. Pain will often localize to the affected SI.
5. Erichsen's Test
Erichsen's test is well-known. Most texts recommend sharp, forceful thrusts into the SI to produce pain and a positive finding, but it has been my experience that it doesn't take that much pressure to aggravate an inflamed SI. This test will stretch and aggravate inflammation in the SI or lumbosacral. I personally view this test as a screening, and will always pursue other tests to validate my suspicion.
6. Iliac Compression Test
Taking a pause while the patient turns over – lying on the unaffected side – and performing the iliac compression test can again help localize pain. With the patient side-lying, push straight down over the iliac crest; positive is pain in the SI.
7. Lewin-Gaenslen's Test
Bringing the affected leg back to neutral and then extending the hip can also aggravate an SI lesion. This is documented as Lewin-Gaenslen's test. This can further be exaggerated by having the patient flex and hold the unaffected knee to their chest while performing the maneuver.
8. Yeoman's Test
When the patient lies prone, you can also perform Yeoman's test. Stabilize the affected PSS with your hand, and gently bend and raise the knee on that side. Pain suggests anterior SI ligament irritation.
Test and Then Document
There are many other tests to further evaluate and define the irritation, but this should help to zero in on SI conditions. Always remember to document findings – positive or negative. Always note where the pain goes. Is it in the back, the buttock and/or the leg? Does it go down to the knee or foot? Does it cause tension or pulling up into the neck?3 Such notes are invaluable when documenting the patient's complaints, the extent / severity of the irritation – and on follow-up, will show the progressive response to your care.
References
- Evans RC. Illustrated Essentials in Orthopedic Physical Assessment. St. Louis, MO: Mosby, 1994.
- Briggs D. "The Straight Leg Raise Test." Dynamic Chiropractic, May 8, 2006.
- Hammer W. "Use of the Straight Leg Test for Upper Extremity Involvement." Dynamic Chiropractic, Nov. 17, 1997.
Click here for more information about Douglas R. Briggs, DC, Dipl. Ac. (IAMA), DAAPM, EMT.


