


As a technique writer, I am frustrated by the limitations of the written word. I try to include pictures of the techniques I am introducing. For this issue, I will go further, knowing that if a picture is worth a thousand words, a video must be worth even more.
This article presents another technique for releasing the rib cage.
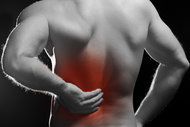
R.S. is an avid volleyball player, unable to play for the past several months. Her pain started after a mild injury that oc-curred early in a tournament. She played volleyball for six hours after the injury. She had constant rib cage pain and pain on the simple motion of rotation to the left. She also had "the Pope's curse," meaning a well-respected orthopedist had told her that she had a torn abdominal muscle, and assured her that it would take at least a year for her to recover. Talk about negative placebo effect.
I assessed her and began with the usual methods I use for rib pain. This included releasing the anterior sternochondral area with slow myofascial release (www.chiroweb.com/archives/20/17/11.html), and using both muscle-energy and high-velocity A-P adjustments to her restricted thoracic segments. I also performed supine mobilization to her stiff intercostal region in the mid-axillary line, pushing from the side to wiggle the rib cage. Wiggling the rib cage (when I feel restriction on pressing medially at the mid-axillary line) used to be my primary tool for releasing the intercostals. This helped; her pain was diminished, but she still was not fully recovered.
I thought about her and realized that I had not really assessed the intercostal spaces thoroughly. When I checked these, inch by inch, I found several tight and tender spots in the intercostal spaces that had not resolved. What can go wrong in the intercostals region? You could think of the tender spots as trigger points and work them out with manual pressure. You could think of the tender spots as an intercostal restriction involving restricted motion and motor memory issues. This second model would lead toward finding a way to restore motion while releasing the muscular tightness. Inspired by Leahy's active-release model and the Graston Technique level 3 seminar, I came up with a way to release these restricted areas using the active motion of the patient. It's a form of "pin and stretch."

Are you mobilizing a joint in this model? Not really. There is no joint between the ribs on the sides. But there certainly can be restricted motion in side- bending or in breathing due to myofascial restrictions of the intercostal muscles. You are using the rib as a lever to very specifically release the intercostal restriction. One of the global themes of this series is that we need to address the whole of the body: muscles, joints, fascia and beyond to help our more challenging patients.
Sitting Side-Bending Intercostal Mobilization
The patient sits in an adjustable-height rolling office chair or stool, ideally set so they have their feet on the floor. You sit on another rolling office chair, facing the non involved side of the patient, and reach around them with both hands.
Before I do the corrective procedure, I carefully assess the lateral rib cage. Which specific intercostal spaces are tight, tender and/or restricted? Is the tenderness directly lateral, or more anterior or posterior? I note this and then perform the mobilization, focusing on each tender area.
From the tender spot, move your fingers slightly inferior to the edge of the rib. Contact the superior edge of the rib with a reinforced thumb contact, reinforced index fingers, or ideally, the Graston handlebar tool. With a female patient, your arm is against her chest, so use appropriate cautions and permissions. As the images show, you are up close and personal with this technique. (If you are uncomfortable with this positioning, you could sit on the involved side and press into the ribs while the patient does the same maneuver described below.)
I have the patient put the involved side arm over their head and show them how I want them to move. I want the patient to take a long inhale, expanding the rib cage, and have them side-bend into the restricted area. I instruct them to "Push your ribs into my hand." Another cue is to have them raise the elbow further superior as they side-bend. They are not laterally bending into you; they are pushing the rib cage sideways into your hand. They repeat this motion several times. I have them expand laterally for two to four seconds and then relax back into neutral posture.
To view a video demonstration of this technique, click here.
For a more anterior or posterior area, I'll have the patient slightly modify their direction of expansion. I can move my contact more anterior or posterior, and then cue the patients to either "push into my fingers" or "push a little more forward (or backward), as you push sideways."
If you are successful, the tender areas should immediately change. The whole rib cage should free up. I often will also use manual trigger-point therapy, a T-bar or Graston Technique to work out the local trigger points. I may want to use laser, microcurrent or electric stimulation to further enhance the tissue change.
On R.S., I found that she had tender and restricted intercostal areas on both sides, left and right, the right one being at the rib 6-7 level, the left one at the rib 5-6 level. Any time you have a bilateral problem, it's harder to resolve.
Don't forget to address both anterior sternochondral and posterior rib/thoracic segment involvements as well. Posteriorly, sometimes the key is an individual thoracic joint that resists lateral bending. You can assess this through tenderness at the involved side of the spinous process as you passively side-bend the patient.
This new technique seems to do a great job of more fully mobilizing the intercostal region. Give it a try. Don't forget to coach breathing, getting the patient to have full excursion of the rib cage as they inhale.
Click here for more information about Marc Heller, DC.