

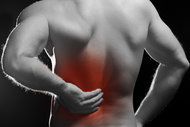


Yes, I am writing one more article on the pelvis, the third one in this series. After 30 years of practice, I still find chronic lower back and pelvic pain fascinating and challenging. We'll start with an overview of what you, the doctor, needs to address to stabilize the pelvis.
We'll start with self-correction for the patient. I try to teach the patient self-mobilization exercises for any chronic joint problem. This is relevant and useful even when there is a hypermobility component to the SI problem. There are two self-mobilizations that I teach for the SI (if you have another, let me know). For an ilium that continually slips anterior-superior, as seen from the front (evaluate the ASIS levels), Don Tigny's basic SI self correction seems to work pretty well. See my article describing this ["Sacroiliac Joint Correction: A Different Model," Dec. 17, 2005] for details. The patient brings the bent leg on the affected side, the anterior-superior side, into full flexion, then resists pushing the bent leg into extension, then uses their arms to passively bring it back into full flexion. This sagittally rotates the ilium. Tigny would have the patient do this on both sides; I tend to find it useful mostly on the AS side.
If the problem side, the symptomatic side, is the PI side, I like home SOT blocking as a self-corrective manuever. A block or wedge (which can be a shoe stuffed with a sock for home use) is placed horizontally under the iliac crest on the PI side, and obliquely downward under the greater trochanter on the AS side. Instruct the patient to lie supine on these blocks for 3-5 minutes, twice a day. It should feel good to them.
SI (Trochanter) Belts
I love SI belts, also known as trochanter belts. They are simple, usually well-tolerated and make a difference for the patient. I use them when it is obvious to me that hypermobility is part of the problem. I like to pre-test to see if they are likely to be effective. If the patient has pain while bending forward, I will put the belt on them and see if the pain reduces. If the patient has pain while turning over in bed, I will have them do the same motion on the table, and then belt them and have them repeat the motion that previously hurt.
It is useful to have a clear indicator of when to use an SI belt. Sometimes these tests are clear; sometimes not. I prefer that these belts be used relatively short term, about two months; after that, the patient should wean themselves off the belt. Once they are done with daily use, I tell the patient to leave the belt in the glove compartment of their car, as one of the challenges for a chronic SI is a prolonged sitting environment. They may also need the belt when they garden, lift or twist.
Muscle Function
Another critical issue is muscle function. Most patients with an unstable SI will develop unilateral gluteal atrophy. If you just palpate the glutes, one side will feel gushy, the normal side more firm. This needs to be rehabbed. It's the usual catch-22 of chronic back pain: The pain and dysfunction creates muscular inhibition, and somehow you need to solve both the muscular and pain patterns simultaneously. I have moved toward a more functional approach to gluteal training using more weight-bearing exercises, such as functional reach and angle lunges.
The other key muscular pattern may be familiar to you, as it occurs in all chronic back pain. The deep, more medial spinal muscles, which include the multifidi, become inhibited. The more superficial, more lateral muscles, the erector spinae group, become overactive. How does this affect the SI? The multifidi attach to the sacrum, so as they extend the spine, they pull the sacrum into nutation, into a sacral-base flexion. This is inherently stabilizing to the SI. The erector spinae attach to the ilium, so as they fire, the extension is created at the ilium, pulling the ilium anterior, the inherently unstable position of the SI joint. So, rehab the multifidi and downtrain the erectors; more easily said than done.
Ligaments and Tendons
Ligaments and tendons are usually dysfunctional in a chronic sacroiliac. (Again, reference one of my previous articles, "Sacroiliac Revisited: The Importance of Ligamentous Integrity," July 2, 2005; I am always pleased when an article I wrote five years earlier is still relevant and useful.) First, you have to find them. Fortunately, a simple palpation for tenderness is usually diagnostic. I have added the sacrospinous ligament (both at its origin and insertion) to my search pattern since the 2010 Interdisciplinary World Congress on Low Back and Pelvic Pain (which I reviewed in the Jan. 15, 2011 issue). The tenderness over the ligaments may resolve from the adjustment, may resolve from normalizing hip motion or may remain. Graston Technique or manual cross-friction are often effective for chronic tendonosis or ligamentous insertional enosopathy. If the patient is not responding to Graston, you may have better results with some form of myofacial release.
Another useful technique for hot spots at a ligamentous or tendon insertion is counterstrain or positional release. I use this when the hot spot is very discrete and exquisitely tender. It is simple; think of slacking and holding. Find a position that shortens and slacks the involved tendon and substantially decreases the tenderness to palpation. Hold it for 120 seconds.
Lighten up your digital pressure on the tender point once you have found the correct position. Your hand on the hot spot is not doing the work; the positioning is doing the work. The best theory I have heard on why this works: A sudden strain pattern set up an aberrant firing pattern in a muscle spindle or a golgi tendon organ, and you are just resetting this neurological pattern. If the ligaments remain tender despite your best efforts, the patient may be a candidate for proliferant injections.
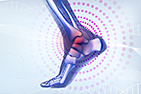
Don't forget the lower extremity. My favorite most-missed pattern is the hip that lacks internal rotation. If the hip doesn't move properly, the SI takes on extra load. Don't forget the foot and ankle; pronation destabilizes the whole of the lower extremity, and a supinator tends to be rigid and lack shock absorption.
Who else is going to properly manage chronic joint pain? It is your job, doctor. Don't just pop and pray. Really look at your chronic patients and individualize the plan for them.
Two More Sacral-Side Lesions
There are two additional sacral-side-of-the-SI-joint lesions that are described in muscle energy. These are less common than anterior or posterior torsions, but still can be significant. (See my videos on these at www.youtube.com/marchellerdc. I am also going to post a table, titled Sacral Corrections, on my Web site for your use. I utilize the table in my treatment room to help me differentiate the sacral lesions.
In review, both anterior and posterior sacral torsions show restriction on the sacral side of the joint, and the restricted side is prominent or superficial. On that same side, the lower sacrum, the inferior lateral angle, is prominent (posterior) or inferior. See my previous article ["The Sacral Side of the SI Joint," Dec. 16, 2010] for a review of these first two sacral lesions.
Our next sacral lesion is a unilateral nutation, meaning the involved side has nodded forward into sacral-base flexion. This is also called a side-bent sacrum, as the sacrum has dropped inferior in the frontal plane on the involved side. This is the only one of our four sacral lesions in which the sacral base is deep on the restricted side, as this is a unilateral nutation. This usually has a traumatic origin.
The correction is direct and relatively simple. Lift the patient's pelvis and place a pillow under it to induce lumbosacral flexion, as you are trying to lift the stuck anterior unilateral sacrum.
The other keys can be remembered as I, I, I: internally rotate the hip, to distract the joint. Contact the inferior part of the sacrum. Do the correction on the inspiration phase of breathing. As the patient breathes in, push the involved sacrum from below in a superior direction. As the patient breathes out, your other hand pushes the opposite, more superficial side of the sacral base inferiorly, while continuing to hold the superior pressure on the involved side of the lower sacrum.
The final lesion is a counternutated sacrum. In this one, the involved side of the sacral base has gone posterior, has counternutated or extended. This is the only lesion in which the ILA, the inferior portion of the sacrum, has come superior on the involved or restricted side.
I like this correction; it's simple and clean. Stand on the opposite side from the sacral restriction. (The keys here can be remembered as E, E, E.) Have the patient propped on their elbows, inducing extension. Place the leg into external rotation. Perform the correction during expiration. You are going to grab the ASIS and anterior pelvis on the opposite side from where you are standing. You are pulling it toward yourself; call it anterior to posterior. Use the heel of your hand to push the involved sacral base from posterior to anterior, directly toward the table. During the inspiratory phase, just hold your pressure. Repeat 3-4 times. You will really feel the motion induced during this correction.
If you wrap your brain around all of these differentials, you'll see why the stork test is so critical. [See "Sacroiliac Mobilization, Part 1," Nov. 4, 2010 issue]. You need to know which side of the sacrum is restricted. Once you know that, the rest of the pieces can be teased out. Chronic sacroiliacs can be very challenging; having the right tools can improve your results and your patients' lives.
Click here for more information about Marc Heller, DC.