

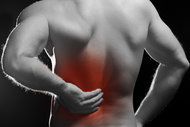


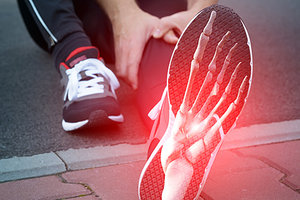
We all know if your feet hurt, you probably don't function well, and we all know many patients complain of foot pain at one time or another. What are the exercise strategies we can use to help improve the function of our patients' feet? I try to develop an exercise program for the intrinsic muscles, extrinsic muscles, neuromotor control and arthrokinematics.
Changing Foot Biomechanics: Start by Observing the Feet
Changing the foot biomechanics starts with the foot examination, which includes visual analysis, shoes and socks off. I note pronation, supination, calluses, bunions, hammer toes, a deviated great toe (hallux abducted valgus), and scars (especially surgical that the patient forgot to tell me about).
Visual analysis is followed by some functional tests (small knee bends, squats, etc.) and then palpation, feeling for point tenderness in the foot, ankle, calf, knee, etc. Palpation gives me an opportunity to trace the pain. As needed, I perform ortho and neuro tests, etc., and then maybe decide to offer the patient an orthotic.
Four-Phase Foot Exercise Rehabilitation Program
My four-phase exercise rehabilitation program focuses on the following:
- Intrinsic muscle activation exercises
- Extrinsic muscle exercise training
- Neuromotor control training
- Arthrokinematics
Phase 1: Intrinsic Muscle Activation
1. I always recommend that my patients increase their barefoot activity.
 2. They can also perform the short foot exercise to activate the intrinsic muscles by pulling the metatarsal heads toward the heel while the long toe flexors are relaxed (versus curling the toes). This is also known as "rooting."
There are three contact points on the bottom of the foot to focus on. The first is located on the heels (point #1). Next are the points just under the big toes (point #2). The last one is under the little toes (point #3). Short foot can be inactive (quiet stance) or active (with exercise or gait). Explosive exercises require part of your feet to lose contact with the ground. Learning to short foot or root, release and reroot quickly will be beneficial for these exercises.
3. Toe gripping with a towel in a seated position; toe gripping with a towel in a standing position.
4. Sandbox gripping while seated. The patient is instructed to buy sand at a hardware or Home Depot-type store and put it in a plastic tray. The idea is to put the foot into the sand and cued to "grip the sand" in a seated position.
Progress to sandbox gripping while standing. The patient is cued to "dig the feet in" while maintaining a neutral pelvis. It's not just pushing into the sand. On points two and three (beneath the toes), they should try "screwing them" in opposite directions. This will add more torque and tension.
5. Instruct the patient to hold the toes against a pamphlet or business card on the floor underneath the toes while you (the doctor) or other person pulls away the card.
Phase 2: Extrinsic Exercises
1. If your patient is suffering from hyperpronation, plantar fasciitis or tight calves, start with stretching. Lack of ankle dorsiflexion may force excessive pronation through the midfoot. Stretching exercises and myofascial release are helpful for restrictions in the gastrocnemius and soleus muscles.
2. With the patient in the long sitting position, instruct them to take a wide belt or stretch strap and hold one end in each hand. Place the center of the belt over the ball of the foot. With their knee straight, instruct them to pull their ankle back toward them using the stretch strap and the muscle on the front of the leg. Think about reverse stretching the arch.
The patient should pull back and hold for 10 seconds; then relax and repeat for five to 10 minutes. They can perform this exercise twice a day for a week to begin experiencing results. Any other type of gastrocnemius and soleus stretch will be helpful here as well.
3. You can also help the patient strengthen the posterior tibialis to become a functional stabilizer. I use a looped resistance band around the feet and have the patient perform inversion. In a seated position, wrap a resistance loop band around the feet, crossing the working foot over the opposite knee. The bottom foot is held still on the floor. Invert the top foot against the resistance of the band. Ensure the patient is only using the ankle / foot to perform this movement and not the lower leg / knee. Instruct them to slowly return to a neutral position and repeat. Start with 10 repetitions and gradually increase to 20 reps.
Phase 3: Neuromotor Control
1. This involves reawakening the gluteal muscles and connecting how the gluteal muscles help control foot pronation. When the glutes contract concentrically, they rotate the leg outward. As the leg rotates outward, the arch of the foot raises.
To feel this, stand with both heels together and your feet turned outward. This is often called a "duck stance" position. Try to actively rotate your legs outward by tightening the glutes while pulling the pelvis into slight posterior pelvis tilt. As the femurs and legs rotate outward, notice how the arches of the feet raise up out of pronation. Hold this position for 30 seconds.
2. Progress the patient to performing this exercise while standing on a stability pad / ball, rocker or wobble board (whatever is available). Instruct the patient to stand on top of the stability pad with their feet facing forward. Teach them how to use the gluteal muscles to raise the arches of the feet. Progress to keeping the arches raised while pushing down the big toe into the stability pad. While pushing down the big toe, the patient should feel tension building in the arch on the underside of the foot. Instruct them to hold this position for 15 seconds.
Balance training is a safe "first step" in any rehabilitation program because it can still improve strength and muscle activation when pain, inflammation and stiffness are present. Additional exercises are single-leg standing with the eyes open and then eyes closed; and throwing a tennis ball while standing on one leg. This is a great exercise when you combine it with phase 1 cues and exercises.
Phase 4: Arthrokinematics
Arthrokinematics is making sure the joints of the foot and entire gait chain roll and glide as they are meant to. As chiropractors, we should always address the possibility of pelvis imbalances and standing leg-length inequalities. Unilateral hyperpronation may cause a functional inequality, increasing the risk of degeneration on the short side and stress fracture on the long side.
Confirmed leg-length inequalities must be addressed. Consistent use of exercises helps me and the patient answer our questions – can I improve the foot biomechanics with exercise?
What gets revealed over time is that the exercises will change the foot, ankle, knee and hip mechanics – sometimes for the better, sometimes not a lot of change, but I don't recall ever making it worse.
Putting It All Together
Perform the adjustments you do, the soft-tissue work you do, and add the stretching and strengthening exercises directed at the foot and hip, specifically the posterior tibialis and hip abductor muscles. Foot exercise programs for pronation issues should incorporate a great deal of proprioception. You can start with simple balance training like a single-leg stance or Vele's. Then progress to lunges on an unstable surface, such as a stability pad or ball. Don't forget to include exercises for the entire kinetic chain that involves the hip abductors (posterior lunge, clam with band, side bridges).
Resources
- Basnett CR, et al. Ankle dorsiflexion range of motion influences dynamic balance in individuals with chronic ankle instability. Int J Sports Phys Ther, April 2013;8(2):121-128.
- Brockett CL, et al. Biomechanics of the ankle. Orthopaedics and Trauma, June 2016:232-238.
- Dill KE, et al. Altered knee and ankle kinematics during squatting in those with limited weight-bearing-lunge-ankle-dorsiflexion range of motion. J Athletic Training, Nov/Dec 2014;49(6):723-732.
- Donatelli R. Normal biomechanics of the foot and ankle. J Orthopaedic and Sports Phys Ther, 1985:91-95.
- Malloy P, et al. The association of dorsiflexion flexibility on knee kinematics and kinetics during a drop vertical jump in healthy female athletes. Knee Surgery, Sports Traumatology, Arthroscopy, August 2014;23(12):3550-3555.
- Michaud TC. Development of the arch: functional implications. Lower Extremity Review, July 2012.
- Rudavsky A, et al. Physiotherapy management of patellar tendinopathy. J Physiotherapy, September 2014;60(3):122-129.
- Tam N, et al. Barefoot running: an evaluation of current hypothesis, future research and clinical applications. British J Sports Med, March 2014;48(5).
- Robbins SE, Hanna AM. Running-related injury prevention through barefoot adaptations. Med Sci Sports Exerc, 1987;19:148-156.
- Discussion with Brian Bachelor from Aline at the ACA Rehab Symposium April 2017.
Click here for more information about Jeffrey Tucker, DC, DACRB.