

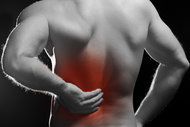


When examining a patient with tight hips, my exam progresses from observing the patient while sitting in a consultation chair, to standing, to walking, to a treatment table. Let's discuss the exam process, including key tests that can help you identify the source of the problem and correct it.
I typically start the examination when the patient is sitting in my office/treatment room chair. I look for slouching, listing to the side, abduction and external rotation of a hip (abduction and external rotation relaxes the capsule). If I see faulty sitting posture, I make some ergonomic improvement suggestions.
Then I transition to standing postural analysis. The patient is standing in front of a mirror and I look at the pelvis for neutral, anterior pelvic tilt (APT), posterior pelvic tilt (PPT) or other pelvic dysfunction. In addition, I check the height of the iliac crest for asymmetry, the glutes for gross atrophy, and overall spinal alignment.
Next, I ask the patient to walk and I observe gait. Look for quad dominance versus glute activation and hip extension. The quad-dominant hip reveals more obvious hip flexion, while hip extension is decreased or even avoided during the stance phase. I observe for an abductor lurch, which may be present as the patient attempts to place the center of gravity over the hip; and I observe whether the patient reduces force on the hip joint.
To deliver (better) results, I help the patient become aware of their static posture and gait so they see what I see.
Step 2: Hip ROM
 Next, I assess active and passive ranges of motion, explaining the results as I go along. Normal hip ROM is as follows:
- 110-120 degrees flexion
- 10-15 degrees extension
- 30-50 degrees abduction
- 30 degrees adduction
- 30-40 degrees internal rotation
- 35-45 degrees external rotation
Lumbar flexion, extension, lateral bending and rotation should be included in the hip examand can be performed prior to hip ranges of motion. If I note abnormal lumbar flexion and/or extension, I like to show patients where they pivot from to help them understand the "tight hip, lumbar spine irritation" connection.
I often notice people using lumbar flexion to make up for a tight hip (limitation). If they're using the low back to initiate the movement, you'll see a distinct arching of their low back at the segment that's moving, as well as some significant hypertrophy of their erector spinae compared to the rest of their spine.
Notice how the patient re-extends or comes up from the floor out of flexion. Do they initiate the movement with their lumbar spine versus from their hips and glutes? If you aren't sure where the movement initiates, give them a load, such as a 10-30 pound kettlebell or sandbag, to pull up from the floor. This will help you see the initiation of re-extension.
The important point here is to teach the patient a proper hip hinge and remove strain on the spinal segments during lumbar motions. If the patient lifts (free) weights in the gym (i.e., deadlifts) and cannot get a proper hip hinge, using a slightly higher surface to pull from (either a rack pull or elevating the weights with some mats or onto other plates) can make the difference between lifting without discomfort from the floor or putting themselves at risk of future low back problems and pain.
Step 3: Key Tests, Outcomes and Corrections
1) Hip scouring range-of-motion assessment: Patient supine; doctor moves the hip through 45-100+ degrees of hip flexion (knee bent), and circles through all available ranges of motion; passive hip range of motion is assessed. There should not be any restrictions (as long as there isn't any muscle tension holding it back).
Outcome #1: Doctor and patient feel tightness in one or two specific directions. It doesn't feel like an impingement or structural limitation; it just feels like a lack of motion and seems "tight or restricted." This is most likely a movement or stability restriction.
Outcome #2: Doctor and patient do not feel restrictions to the passive range of motion, but the patient complains of having the perception and feeling of being "tight or stiff" in the hips. Suspect the joint is hypermobile and the bigger (global) more outer mobilizer muscles are overactive, trying to provide extra stability for the underactive inner (deeper) stability muscles.Outcome #3: Impingement is suspected. Forced flexion combined with internal rotation is very uncomfortable and will usually elicit symptoms associated with even subtle degrees of hip pathology.
2. Thomas test: This is helpful to figure out the hip motion in the sagittal plane. The supine patient is at the edge of the table, brings one knee to the chest and lets the other leg hang down off the table. The doctor observes the pelvis (Did it stay in neutral?) and lumbar spine (Did it stay in neutral?), and interprets the hanging leg.
Outcome: The knee-to-chest side does not hurt or cramp. The hanging thigh reveals a tight psoas, tight rectus femoris or tight TFL. Normal is when the thigh is about parallel to the table or about 10-15 degrees above the table with the leg hanging down at 90 degrees (bent knee). The Thomas test gives you a visual sense of what the patient's mobility is like and gives the patient a "feeling" about muscle tension of the hip flexor muscles.
3. Hip internal and external rotation: This involves testing in three positions – seated, supine and prone. (I actually do check it in each position!) I like comparing the range of motion (hypermobility or tightness) in each position. A restriction or hypermobility is a sign that something isn't quite right and the question to ask yourself is, Is it related to the structure of the joint or the muscle? For teaching purposes, the point I want to share is to make sure you maximally internally and externally rotate, but make sure it is isolated to the hip joint only.
Outcome #1: Decreased internal rotation. The tissues of the hip that resist internal rotation are primarily found on the lateral aspect of the hip. You may be dealing with shortening of the capsule or myofascial structures such as the piriformis or superficial fibers of the gluteus maximus. These muscles play a key role in providing lateral stability to the spine, along with the obliques, psoas, serratus anterior and latissimus dorsi.
Programming: This is where the side plank comes in. It can help to stimulate the lateral stabilizer muscles and force them to work together to help stabilize the spine in a position that doesn't allow compensation; and therefore can reset the hip and core to allow the hip to move properly. If the patient requires a more remedial exercise, try having them perform side-lying leg raises. This stimulates the lateral stability system as well.
Outcome #2: Decreased external rotation. The tissues of the hip that resist external rotation are primarily found on the medial and front of the hip. These muscles play a key role in providing anterior core instability.
Programming: This is where the front plank comes in. When done properly, the hip flexors are held in a stretched position (neutral pelvis) while the rectus abdominis is working in conjunction with the obliques, rib cage and the glutes to provide pelvic and spinal stability.
A "good" front plank (no lumbar extension) is achieved by keeping the spine and pelvis in neutral. The glutes must be squeezed as hard as possible so the hip flexors stretch, the ribs do not flare and the abs are hard, as if someone is going to punch you in the stomach.
Editor's Note: Dr. Tucker lists ACA diplomate rehabilitation course notes as a resource utilized when writing this article.
Click here for more information about Jeffrey Tucker, DC, DACRB.