
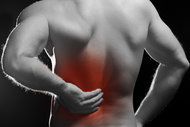


Lower back or buttock pain with radiation into the posterior leg is an extremely common presentation. When sciatica is present, at our clinic we always consider the possibility of a "double crush," addressing both the lumbosacral component and the piriformis.
Before Getting Started...
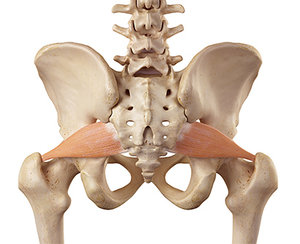
In order to understand the following techniques, it is important to realize that the piriformis:
- Originates on the ventral sacrum and sacrotuberous ligament
- Inserts on the greater trochanter at the hip
- Laterally rotates the hip when the leg is straight (hip extended)
- Abducts the hip when the hip is flexed
This reminds us where it is so we can get at it; and in what positions / actions it will become contracted and possibly compress or irritate the sciatic nerve.
Treatment: The Four Techniques
Addressing the spine is always essential in resolving sciatica. This is usually a strong area of expertise for most clinicians and is not be examined in detail here. My focus is decreasing any possible compression or irritation contributed by the piriformis.
 1. Adjustments: In these patients, hip ROM is usually limited in internal rotation. A long axis adjustment with the patient supine should be considered. This is usually best performed with the leg flat on the table, hip internally rotated and both clinician hands gripping the leg just above the ankle.
The thrust is quick, long axis straight inferiorly. Subluxation assessment at the fibular head and lateral malleolus should also be performed and these areas adjusted if indicated.
2. Muscle Work: Position the patient prone. The knee on the affected side is bent to 90 degrees and the bent leg is rolled toward the opposite side. (The bent lower leg is lying on the back of the opposite knee.)
Instruct the patient to keep the knee bent, and when they feel firm pressure in the buttock, to rotate their bent leg so the foot and ankle move away from the opposite knee; up and to the outside. The anterior thigh stays in place on the table.
Locate the greater trochanter and just superior and posterior to it, apply very firm pressure. This should be at the upper portion of the piriformis insertion. At this point, the patient should begin to move the leg. Simultaneously, with your other hand on the patient's ankle, apply gentle resistance while the leg is being moved.
When maximum rotation is achieved, the patient relaxes, their leg is passively positioned back to the starting point against the opposite knee, and you repeat the muscle work, with firm pressure all along the distal piriformis posterior to the greater trochanter.
3. Stretching: Oftentimes, traditional home stretching of the piriformis requires hip and knee positions that can be difficult for patients with this condition due to age and arthritis. So, although the stretches that are often taught are great, many people can't tolerate them.
My "go to" stretch is a simple, seated knee-to-opposite-chest stretch. While seated, the patient places either hand around the inside and outside of the affected thigh, just above the knee. With the knee comfortably bent, they pull the thigh up and across to the opposite chest.
It is important that the foot of the leg being stretched is kept as far away as possible from the opposite knee; at least a few inches. The patient should also be instructed to relax their abdominal muscles and breathe; otherwise, there is a tendency for breath holding to occur.
In my clinic, we often assign 10 repetitions, with 10-second holds, four times per day. This stretch can also be easily performed supine.
4. Home Instructions: By far the most important home instruction is to avoid letting the affected leg turn out. If the toes or knee is pointed out, this will contribute to the problem.
The patient should be coached to watch out for this, especially when driving, sitting at their desk and lying in bed. In bed, they will often do well to lie with the affected side up. If sleeping on their back, they may gently wedge a pillow between the outer thigh and the mattress to keep the leg from rolling out.
Icing, electrical therapies, cold laser, posture correction, cushions and supports, and a host of other therapies also can be helpful. However, I have found that by focusing on the four techniques above, even the most stubborn cases of sciatica often respond very well.
Resources
- Michel F, et al. The piriformis muscle syndrome: an exploration of anatomical context, pathophysiological hypotheses and diagnostic criteria. Annals Phys Rehab & Med, 2013 May;56(4):300-11.
- "Diagnostic Anatomy of the Sciatic Nerve." In Russell SM: Examination of Peripheral Nerve Injuries. Thieme Publishers Series, 2006.
Dr. Mike Powell practices in Cedar Rapids, Iowa. He is a chiropractic neurologist, lecturer and developer of the "Brain In Mind" continuing-education courses. For more information visit www.BrainInMind.org.